Hey friends! Lately I’ve been thinking about all the ways I overcomplicated course creation when I first started. Do you also feel that doing something new always seems harder than it ends up being? That’s the thing, what if you could create your course with just 3 simple things (that you likely already have and use)? 

Yep. You read that right. And nope, it’s not gonna cost you thousands of dollars. If you want to create a course but whenever you think about it, you instantly get a massive headache… I’m about to show you how simple it can be to create your course if you just have this powerful course creation trifecta.

(decoration) The course creation trifecta The ONLY 3 tools you need to create your course
This post includes affiliate links. This means that if you click on the links and make a purchase, I may receive a commission from the sale at no extra cost to you. I’m only an affiliate for tools I’ve used and recommend.   

So what is this magical course creation trifecta? Easy. The three essential tools to create your course with ease and without breaking the bank are:

  ✦ Canva.com

  ✦ A good microphone (Blue Yeti recommended)

  ✦ Loom.com

Course Creation Essential #1: Canva.

I’m sorry to tell you (and I say this with love) but if you haven’t heard about Canva by now, you maaaay have living under a rock 😉 (and also missing out big time).

Canva is the EASIEST way to create your slide presentations to get your lessons ready to record. Like seriously can’t-get-it-wrong-even-if-you-try easy.

You don’t need to have a knack for design. They have TONS of templates available to choose from, completely plug and play. Simply add your own information, colors and photos and BOOM, your course is ready to record. Woo!

Once your presentation is ready, you can export it as a PDF or simply use the built-in features to teach your presentation within Canva (easy no?).

Image shows where to find the present options in canva. Go to the course lesson presentation design, then on the top right corner of the screen find "Present" button. Click on it and make sure the first option "Present full screen" is selected. Then click the purple button below that says "Present".

Why do you need a slide presentation?

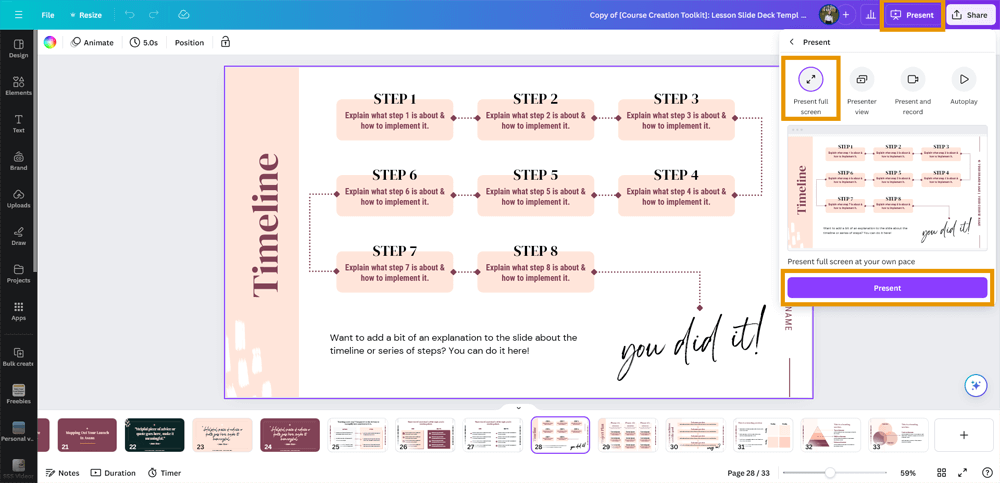
It’s not necessary either, but it’s a great tool to help you convey what you’re teaching in a visual way and help your students follow along with ease. Plus, it includes talking points so you know you won’t lose your train of thought halfway through recording a lesson!

Slides can have additional information or visual explanations (graphs, screenshots, bullet points…) that make it much easier to consume the content you’re teaching.

If you want to save time and get done-for-you templates for your course, webinar, workbooks, and more course creation resources, check out my Course Creation Toolkit.

✅ Lessons ready to record? Check!

Course Creation Essential #2: A good quality microphone

Listen, you don’t need to be on video to create an epic course people pay thousands for.

But you need a good microphone. Audio is key! If your audio is bad quality, chances are your students won’t make it far into the course.

However, don’t worry, that doesn’t mean you have to spend thousands on a recording studio. Nuh-huh. I use the Blue Yeti microphone that cost me around $120 a few years back and it sounds really good.

Browse around for different alternatives if you want, but the Yeti is a sure bet (you’ve probably seen it in every stock photo in existence haha).

PRO-TIP:

Heads-up! The stock photos may mislead you if you buy the Blue Yeti. It’s not a mic like the ones you see singers using where you speak to to the top.

This is the correct way to use th Yeti for good quality audio:

Image shows how to use the blue yeti mic correctly. It features a yeti speaking to the front side of the mic, in the correct way. And another speaking to the top of the mic, doing it incorrectly.

The Blue Yeti has four different audio recording modes:

Cardioid mode: only picks up audio from the front (best when you’re the only one recording and want to minimize background noise)

Bidirectional: picks up audio from the front and the back (ideal if you’re podcasting with someone in-person and only have one mic).

Stereo: picks up audio from both the right and left sides.

Omnidirectional: picks audio from all sides.

❌ It doesn’t pick up audio from the top.

Why is audio so important (beyond the obvious reason)?

Because a lot of your students will consume your course as if it were a podcast. They will listen to you without necessarily looking at the screen or your slides (guilty as charged, over here).

If the audio is patchy or you look like you’re recording underwater, don’t expect them to put up with it for too long 😉

I used to have a subpar mic in the past and it made me sound robotic and awkward. I held back on recording content because I didn’t like the way my voice sounded. When I switched to the Yeti, I noticed a big difference and started recording more!

Course Creation Essential #3: Loom.com

Loom is an ah-mazing tool to record your screen and/or yourself! It will make recording your lessons a breeze.

You can record your screen only, or have a small video bubble on the corner so your students can also see your face as you teach the lesson with the slides.

Or if you’re a fan of “talking head” videos with no slides, it will also work for that!

The best part is that Loom has a built-in video editor! Say whaaat? So it’ll be easy peasy for you to edit your videos and remove any mistakes without needing an editor or expensive and complicated software.

The cherry on top is that you can embed your Loom videos anywhere you want! So if you need to host your course on WordPress or Thrivecart Learn (affiliate) you can simply use Loom!

I highly recommend the paid plan for Loom so you can have more than 25 videos and embed them without Loom branding.

Screenshot of my course content hosted in Loom, and then embedded into my ThriveCart Learn school.

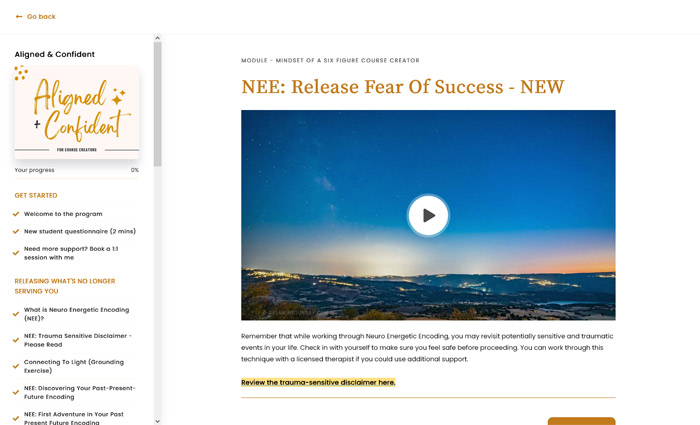
I personally have my course videos hosted in Loom and embedded into my ThriveCart Learn school and I’m beyond happy. It looks professional and doesn’t cost an arm and a leg (did I tell you that most course platforms cost upwards of $1000+ a year? Yeah, this is very affordable in comparison!).

✅ Recording, editing and video hosting? Check!

Related: The best platforms to host your online course (when you’re tight on budget)

Over to you - How do you feel about creating your course now?

There you go! You’ve got yourself a powerful combination to create your course with no headaches. 

If you use Canva to create your slides, a good mic to record yourself teaching and Loom to record, edit and host your course, you’ll be shocked how easy it could be to create your course.

How are you feeling about creating a course now that you see how you only need these three powerful tools? I personally feel it’s more accessible and less overwhelming.

But if you want even more time-saving support with creating your course, my Course Creation Toolkit is about to become your favoritest thing ever 😉

SHARE THIS WITH OTHERS
Know of anyone who needs to know about this? Share it with them!